
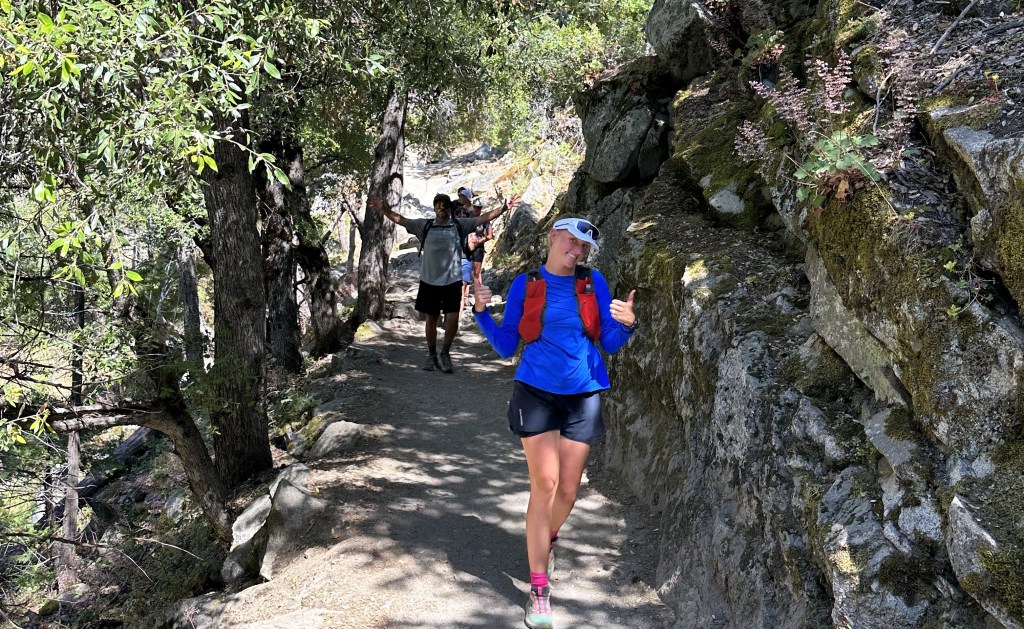
Wondering if you can hike Half Dome while pregnant? At 4 months, I did it! Here’s my experience, safety tips, and how to prepare for Yosemite’s most iconic hike.
My parents called me up when I was about four months pregnant and told me they had an extra permit to hike Half Dome. They asked if I wanted to come. This hike had always been a bucket list item for me, so I was eager to go. Though the group had some concerns about me making the trek while pregnant, I was determined to go up and fully embrace the adventure.
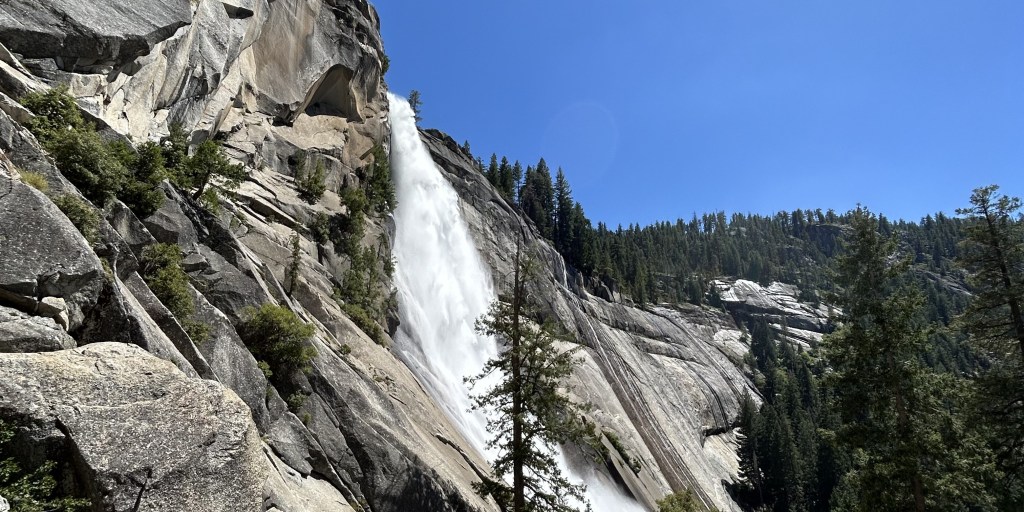
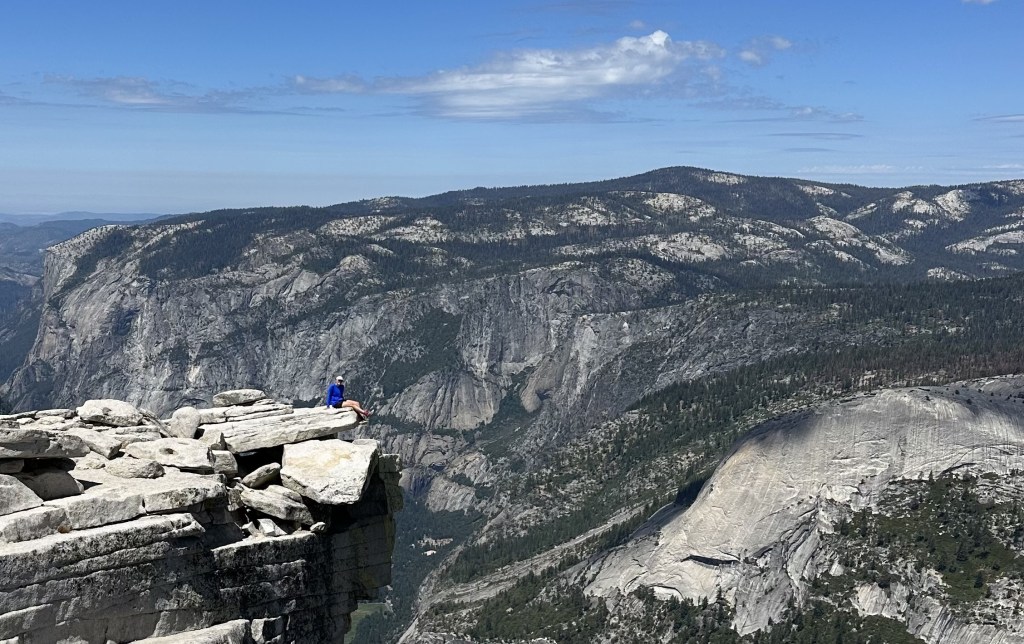
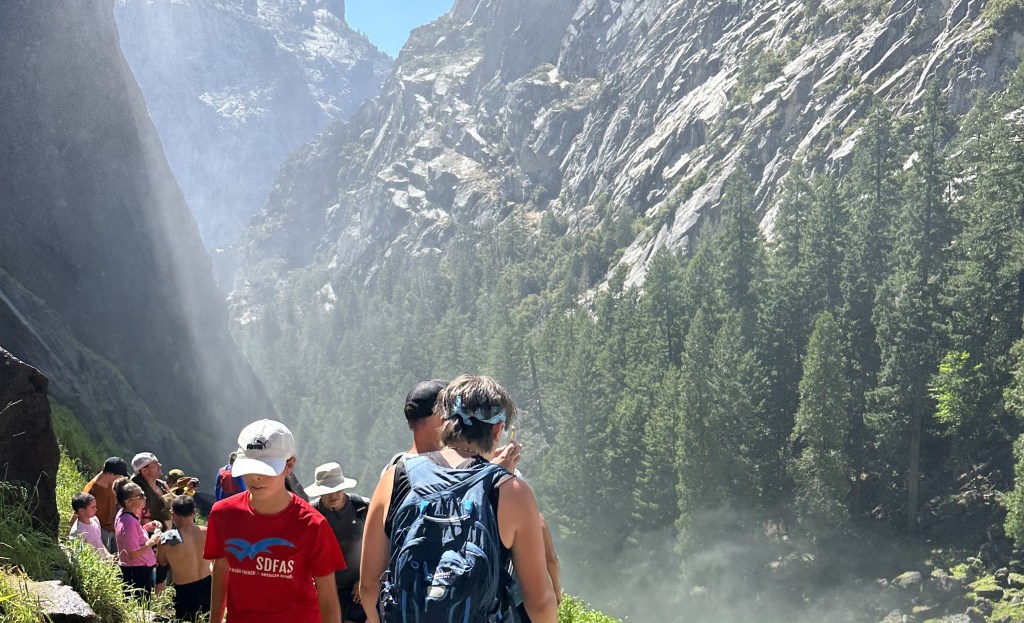
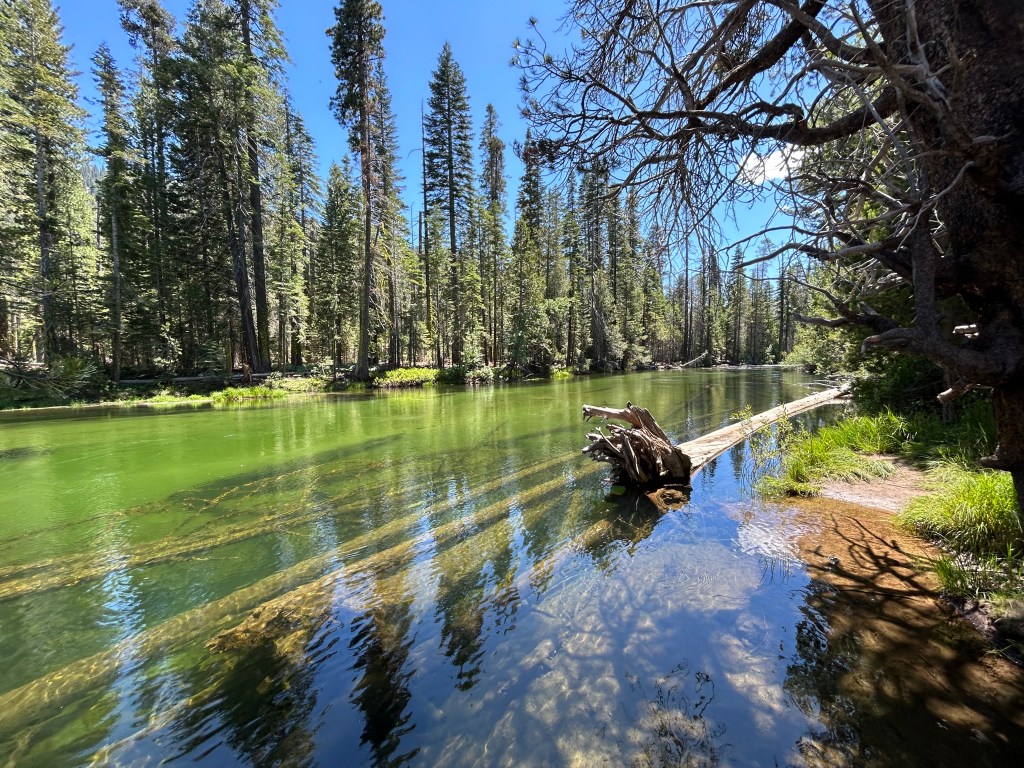
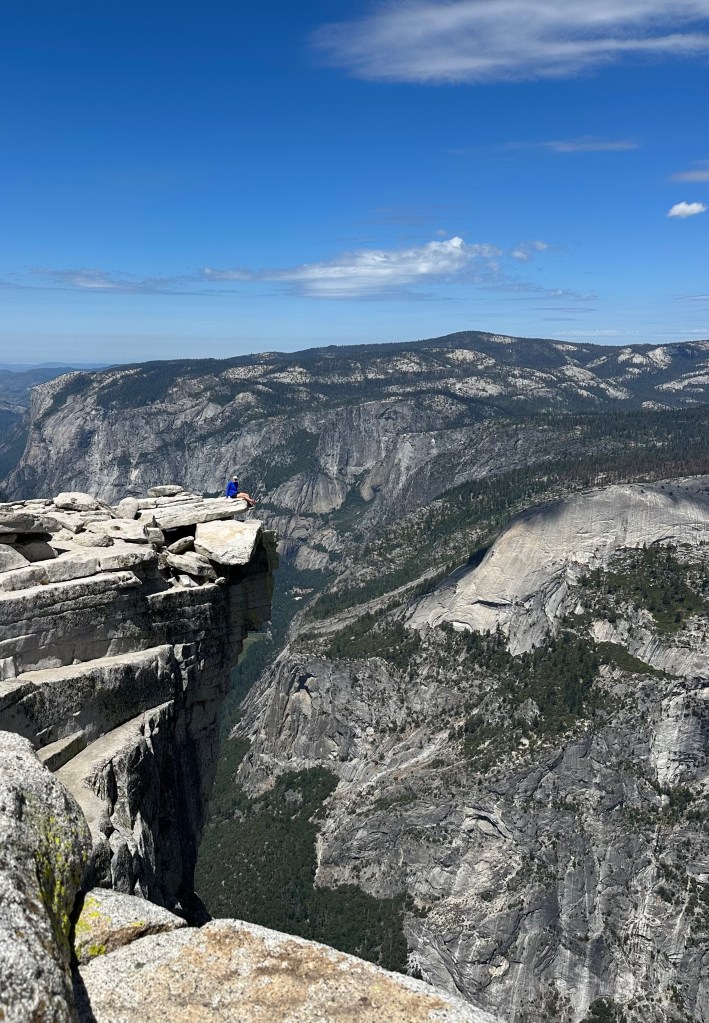
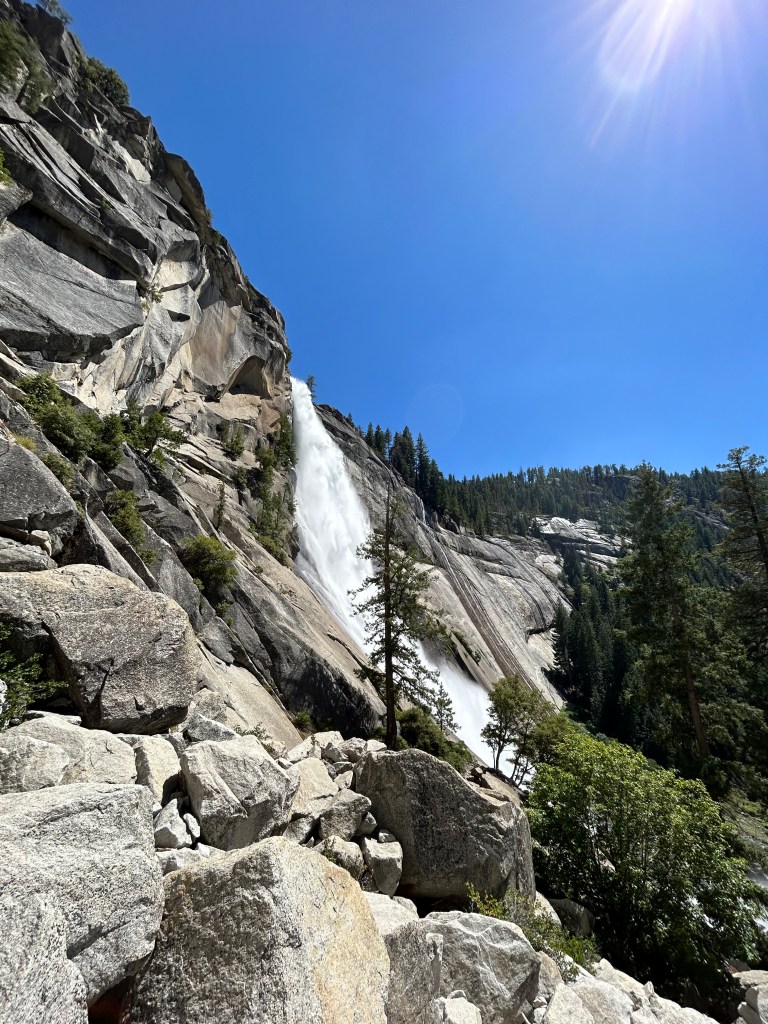
Yosemite National Park in California is home to one of the most iconic and challenging hikes in the US, Half Dome. This trail takes you on an unforgettable 4,800 foot climb over 15 miles over rugged terrain and past breathtaking waterfalls and mountain views. The summit stands at 8,836 feet and boasts beautiful 360° views of Yosemite Valley and the Sierra Nevada.
Apply for a Permit

Half Dome is one of the hikes in the park that require a permit in order to complete the hike. These permits are required 7 days a week To apply for the permit you can visit https://www.recreation.gov/permits/234652. A maximum of 300 hikers are allowed (about 225 day hikers and 75 backpackers) each day on the Half Dome Trail beyond the base of the subdome. On the site you will also find additional information about the hike, dates and permits.
What to Pack?

Throughout my pregnancy I kind of figured out what worked for me in terms of what I needed to pack for big days. It can be an adjustment because there are definitely many things that you need when hiking 15 miles while pregnant that you wouldn’t need otherwise.
These are my essential items and gear:
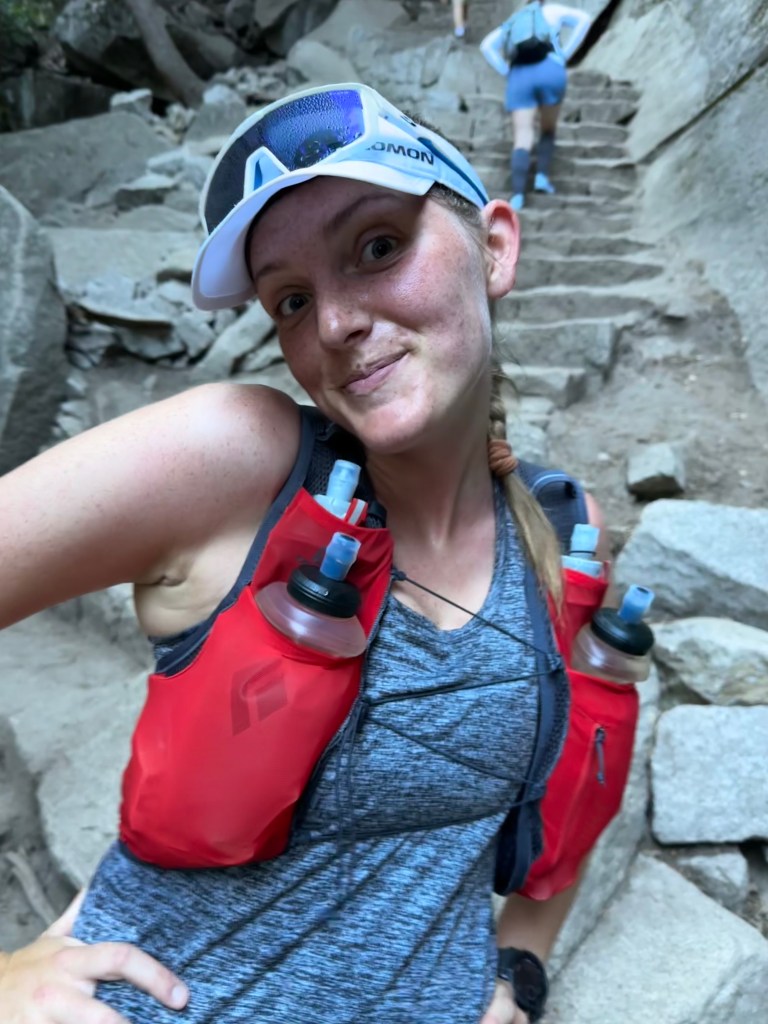
- Running Pack– I like to use a running pack rather than a hiking one simply because they are much lighter and cooler to carry around yet can hold about the same amount of supplies.
- Hydration– I prefer to use soft flasks but a bladder works great too! (You will need to bring more water than you are used to bringing when you arent pregnant).
- Go Girl!– I love to bring my Go Girl female outdoor urination funnel. They are so great for the pregnancy bladder.
- Snacks– For snacks I prefer to bring nuts, trail mix, sweet potato whole foods but it is different for everyone! Bring snacks that you enjoy and that wont make you sick.
- Exectrolyte drink mix– I like to bring liquid IVs with me on my big days so that I ensure I am not getting dehydrated.
- Light-weight harness– this is for when you are going up the cable system. you can use a regualr harness but a lightweight one is best for packing down small.
- Carabiners and a PAS (personal anchor system)– this is the gear you will need along with the light-weight harness to make your safe ascent up the cables. I will explain how to use them in the “Doing the Cables Risk Free” part of the post.
- Gloves– though not required, most people prefer to wear gloves while making the final climb up the cables.
- Your Permits!– make sure to bring your permits with you as they usually have a ranger hanging out at the cutoff mark who will check and make sure that you have it.
Is It Safe to Hike Half Dome While Pregnant?
If you’re reading this you may be asking yourself is it even safe to hike Half Dome during pregnancy? The answer is that it is different for everyone. This is my experience and is in no way ment me be medical advice. Every woman and every pregnancy is different. That being said, I would say that it is 100% safe to try! Listen to your body and pay attention to how you feel. Don’t push yourself too hard and don’t be afraid to turn back and end early. The hike is breathtaking the whole way up, it will be worth it even if you only go one mile!
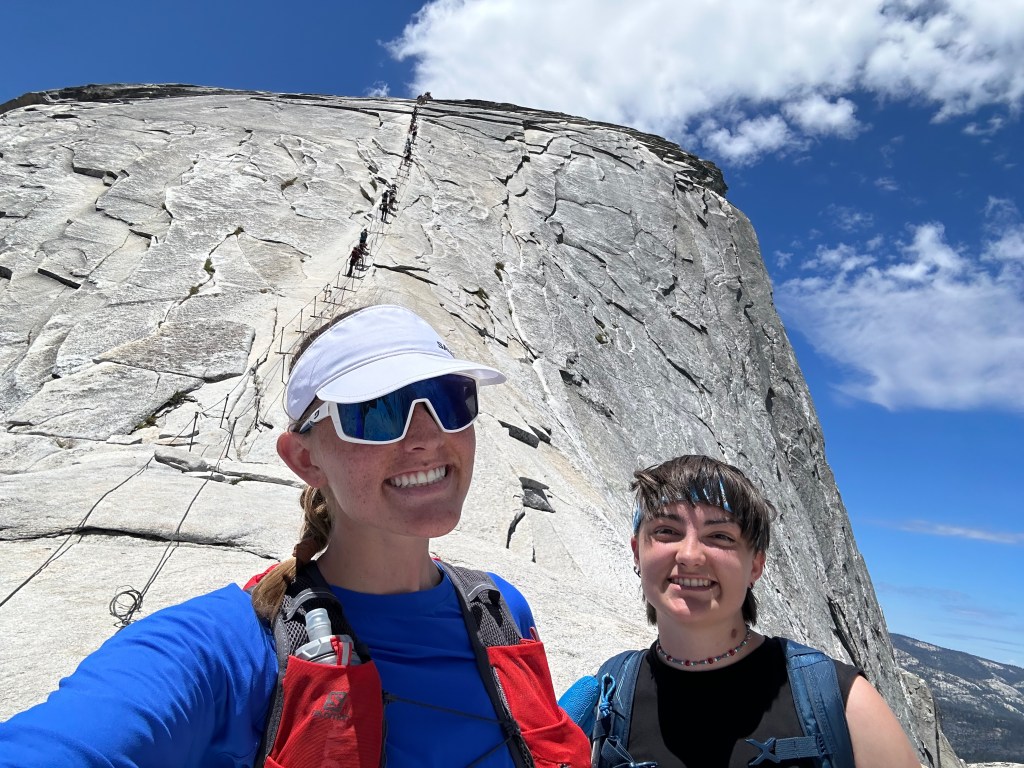
Doing the Cables Risk Free

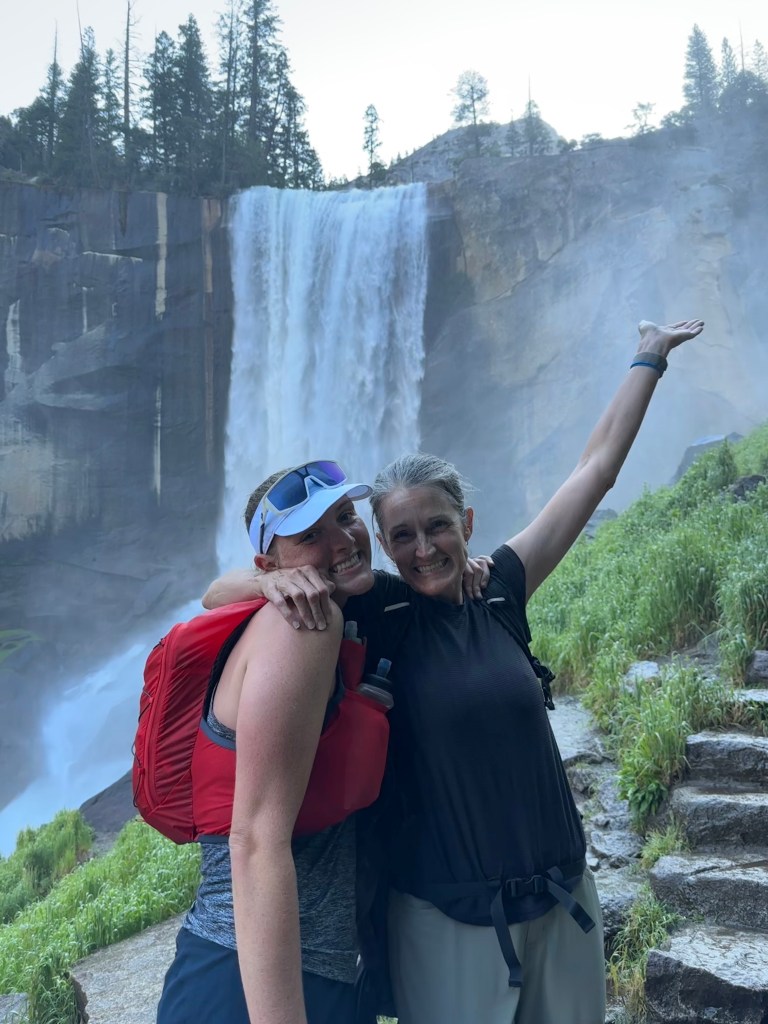
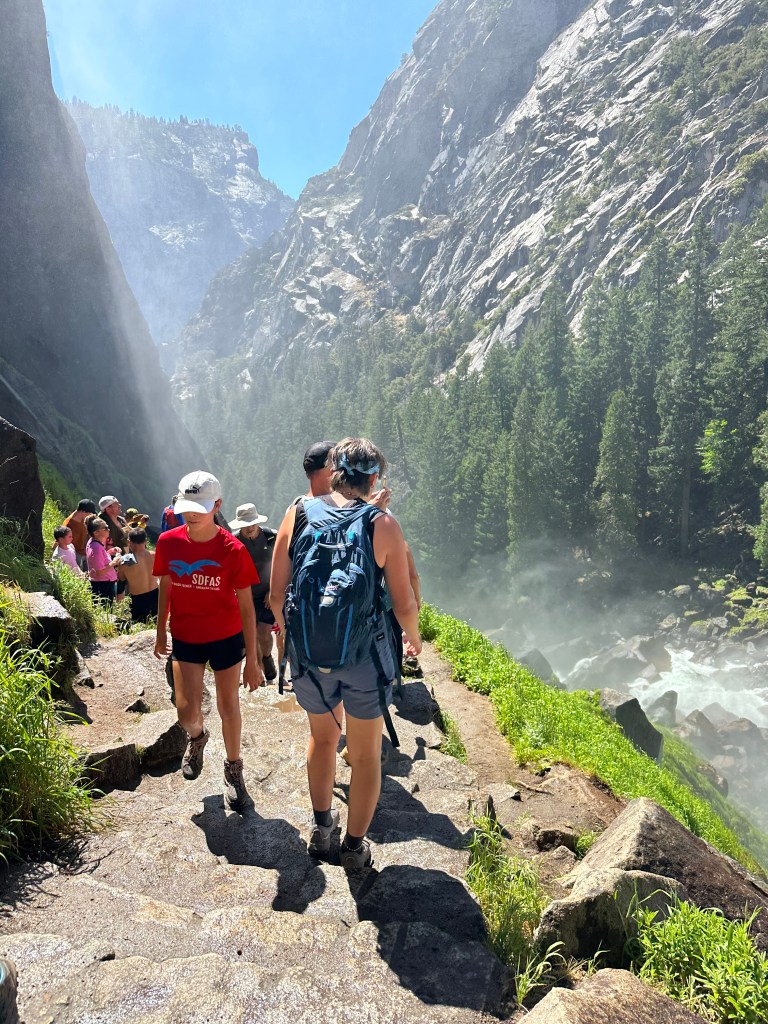
The iconic Half Dome hike starts by leading you through a beautiful pine forest, it then takes you up past Vernal and Nevada Falls and then up some steep granite switchbacks. After that there is a final push to the top where you get to an exposed, cable assisted ascent to the summit. Though not required I would recommend bringing a light-weight harness and some gear to make your experience very safe and stress free.
How I locked myself into the cables: I brought a packable light-weight harness that I just stored in my runnig pack. I then brought a PAS (personal anchor system) that is used for rock climbing and canyoneering. I looped the pass through my harness with a girth hitch and attatched two carabiners to the end of the PAS. Then as I went up I kept the carabiners locked onto the cables and moved each systematically over the the spots where the rods were holding up the cables. This created an enjoyable and risk free experience for me going up this famous part of the hike.
When to go?
The cables are normally up the Friday before the last Monday in May (Memorial Day) and the last day to use the cables is the day after the second Monday in October. These dates are subject to change based on conditions. I went in late June. The weather was perfect for us. It was cooler in the morning when we started and cooler at the top. The hottest parts were the steep granite switchbacks after the cooling mist of the waterfalls and the end of the hike when we got back down into the valley. But overall the weather was very pleasant.
What to Wear?
These were my essentail clothing items for this summer mountain hike:
- Dri-FIT Tank Top– this was great for the hottest parts of the hike and lightweight enough to waer under my other clothes. (if you don’t have a Dri-FIT one I’m sure any lightweight tank top would do.
- Sun Shirt or Sun Hoodie– this is my #1 most highest recommended clothing item. It is perfect for this hike and most summer mountain hikes. They keep you warmer if it is chilly yet some how also cool you off in the heat. They are the best for providing natural protection from the sun as well.
- Hat and Sunglasses– These will protect your face from the sun and ensure you can fully enjoy the views without the glare in your eyes.
- Trail Running Shoes– I personally prefer trail runners over hiking boots becasue I find them more comfortable and less likely to give me blisters. This day I wore my Salomon Sense Ride 5s.
- Running Shorts with Spandex Liners– It is essential to get the ones with liners to prevent chaffing on the inner thighs. I prefer shorts to leggings because the are cooler in the heat.
- Garmin Watch– This is of course essential because “if you didn’t strava it, it didn’t happen” right? 😉
- Belly Support Band– I did not take one of these on my hike this day because I did not have much of a belly yet and was not feeling much pelvic pressure. However, I did end up using one on hikes a lot more later on in my pregnancy.
Well, I hope these tips helped you get ready to hike Yosemite’s Half Dome or at lease made it seem a little less intimidating! Remember, pregnancy does not mean you have to give up all the things that you love to do! By listening to your body and being safe and smart you will find yourself truly nourished by motion throughout this special time of life!
Disclaimer: The information provided on this blog is for general informational purposes only and is not intended as medical advice. Always consult with your healthcare provider before beginning any new physical activity, including hiking, while pregnant. Each pregnancy is unique, and your healthcare provider can help determine what activities are safe for you based on your individual health and circumstances.


Leave a comment